Posts

Showing posts from March, 2016

Glaze Day or Bust!

Image
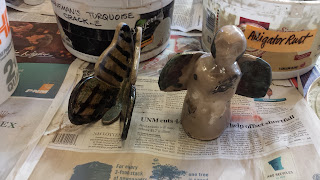
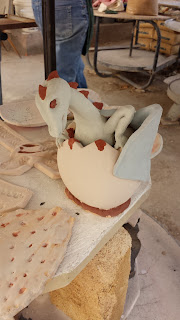
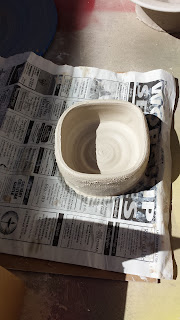
Saturday was Glaze Day. I only had 4 pieces for the traditional high-fire glazing, but I also had pieces to raku. The only new piece was the top of my egg, which I completely forgot about the previous week (oops). I also had two older pieces I wanted to re-fire because I didn't like how they'd come out. Here they are before I did anything to them: That's one of the nice things about raku; do-overs aren't too hard to do. There was enough room for my two older pieces, so I reglazed them and they were fired on Saturday in two separate firings (that makes *three* for this session! we apparently love our raku around here!). I put curdle blue on the top part of the butterfly's wings and glass red on the lower part. I also added just a bit more alligator rust to the body. I put white crackle on the head and body of the angel, plus glass red on the wings and in splotches here and there on the rest of the piece. Here they are after applying new glaze, and then after t

The End is Nigh

Image
Saturday was the last day for wet clay. I couldn't really do anything new on the wheel, mainly because it wouldn't dry fast enough to trim or to be ready to be bisqued in time for this coming Saturday, which will be Glaze Day. I did manage to trim my final cylinder-thing without destroying it, so yay. I completely forgot to take a photo though, because Saturday was really quite hectic. We did a raku firing, which ate up a lot of time; first I had to paint my dragon with raku glazes, like so: I always think it's neat to see what the glazes look like first. Some of the newbies kept thinking the final color would look like the color when it's not yet fired, and that's definitely not always the case. I put white crackle on the shell (though alas, it didn't really crackle), alligator rust on the main body, glass red on the spines, black on the eyes, and a new glaze on the wings. It was technically a regular low-fire glaze, I believe, but our teacher speculated

Assorted Clay-Related Activities

Image
Saturday was the fourth class of this session, and I did a little of this and that. The first order of business was getting our bisqued saggar pieces ready for the actual saggar process. I would have taken pics, but my hands had toxic chemicals on them, and I wasn't gonna get that stuff on my phone... First we all donned gloves, and then for people who wanted a pink color to come out during the firing, we painted a solution on our pieces (while wearing face masks... Lots of protective gear during this process!). I failed to ask what was in the solution, but you apparently aren't supposed to get it on your skin. Anyway next, you tear off 2 pieces of aluminum foil large enough to securely wrap your piece in. You then add various types of combustibles, including organic matter like banana peels, horse hair, cat or dog food, or leaves, as well as powdered household chemicals like fertilizer or weed killer, and finally small bits of metal, such as a bit of steel wool or a bit from a