Posts

Showing posts with the label pottery

Glaze Day or Bust!

Image
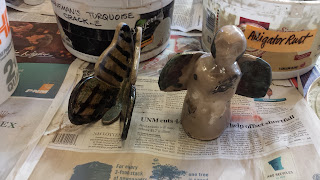
Saturday was Glaze Day. I only had 4 pieces for the traditional high-fire glazing, but I also had pieces to raku. The only new piece was the top of my egg, which I completely forgot about the previous week (oops). I also had two older pieces I wanted to re-fire because I didn't like how they'd come out. Here they are before I did anything to them: That's one of the nice things about raku; do-overs aren't too hard to do. There was enough room for my two older pieces, so I reglazed them and they were fired on Saturday in two separate firings (that makes *three* for this session! we apparently love our raku around here!). I put curdle blue on the top part of the butterfly's wings and glass red on the lower part. I also added just a bit more alligator rust to the body. I put white crackle on the head and body of the angel, plus glass red on the wings and in splotches here and there on the rest of the piece. Here they are after applying new glaze, and then after t...
Third Time's a Charm

Image
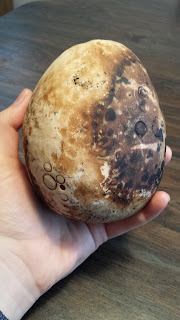
Ok, so, I never actually documented my projects last summer like I had intended, nor did I record the fall session. But hey, it's a new pottery session (started last Saturday, ), so might as well give it another go. We'll be doing raku like usual, as well as a saggar firing  (you coat the piece in a special chemical, then wrap it up in aluminum foil with some combustibles, and fire it like that). Last session we tried obvara for the first time, but pieces had an unfortunate tendency to crack and/or blow up. One takes the red hot piece out of the kiln, dunks it in a "brew" of water, flour, sugar, and yeast and then dunks the piece in water, going back and forth between the two a few times. So, you know, blowing up happens... We voted on which special firing techniques to do this session and I'm guessing that's why obvara lost. Ah, well. My plans for the special firings are to make dragon eggs. I made an obvara dragon egg last session which somehow did not...

I'm Not Dead Yet

So for unknown reasons I more or less stopped posting in this blog 2 years ago. Obviously. I'm not actually sure why... I failed to document several pottery sessions, which is a shame.  I kept meaning to start posting again as I took pottery this summer, but then kept getting busy and forgetting. But I figure now's as good a time as ever. I will attempt to document what I did this session and then hopefully I'll keep it up moving into the next session. The format for the pottery classes has changed slightly, in that now we actually get a personal stock of clay with our supply fee, and then if we use more we can purchase more. I, being a perfectionist, always end up with not many projects because I spend loads of time on each. So I used only about half of the 25 lbs of clay we were allotted. I have a decent amount of 1/2 and 1/2 left, plus a small amount of red raku clay and 10 (or was it 5?) lbs of porcelain. The latter I didn't touch at all. Oops. My goal before the ...

The End... Only Not So Much.

Image
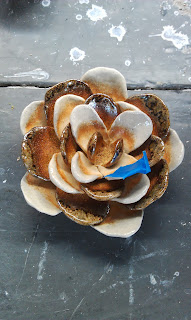
Finally, last night the kiln used for the soda firing and the main kiln (used for the cone 10 firing, in which the majority of pieces went... at least the majority of everybody else's pieces ;) ) were unpacked. My flower came out gorgeous and it'll be going into the show. For the summer class, there's generally an art show put on with the students' and teachers' best pieces; everybody always has at least one or two things that turn out well, and they get put in a gallery with fancy lighting and it's just awesome. So anyway my flower and my horsehair piece will be going into the show for sure. Cthulhu or my teapot may go in, as well, but as the teapot wasn't yet fired our teacher hasn't yet made up her mind about it. The blue tape on my flower marked it as something our teacher wanted in the show. ;) Other than watching the main kiln being unpacked, I also glazed my spoon rests, as they had been bisqued. I did one each in Emily's Purple, Michi...

Glaze Day

Image
Saturday, August 3, was Glaze Day. As it happened, I only had a single thing to glaze: my teapot. My spoon rests were still being bisqued, and everything else was fired using an alternative firing method (my flower was still in the process of being soda fired, in fact), so the teapot was it. This turned out to be a very good thing, as it took an inordinate amount of time to finish the teapot. I painted it with underglazes, so it was a very meticulous and time-consuming affair, as I had to make sure all the nooks and crannies were colored, that there was even coverage and no splotches, etc. I was at it for at least 2 hours, I think. I painted the eyes blue, with black pupils and lighter blue lines in the irises, so they aren't so monochromatic. I painted the hair and eyebrows black, then added small lines of brown, to try and give them some depth. Finally I painted the body and trunk light grey; I tried to thin out the glaze a fair amount as I was a little worried it might come out ...

Rakuuuuu! And Horsehair.

Image
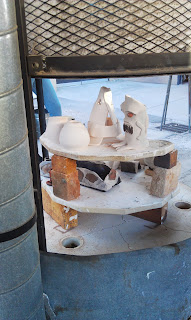
The last week has been pretty insane, so I didn't have much of a chance to sit and recount my pottery adventures. Thursday, August 1, was the last day for wet clay. There were also two raku firings, items were chosen and put into the kiln for the soda firing, AND we had a potluck (my contribution: curried deviled eggs, yum!). So it was a pretty hectic evening. First, I had to paint Cthulhu with raku glazes, which I did in a massive hurry in order to get him into the first raku firing. I used curdle blue for his wings and the front of his body, alligator rust for his back (to look like scales), white crackle in his eye sockets, some kind of black on his tentacles, turquoise crackle on his arms (I think), and copper luster (again, I think) on his eyes. Towards the end I was in a crazy hurry so things got a bit hazy! I left his eye slits and his teeth bare, in the hopes of them getting all black and awesome from the smoke. Here's a pic of the kiln before it was fired up, with Cthu...

The End is Near

Image
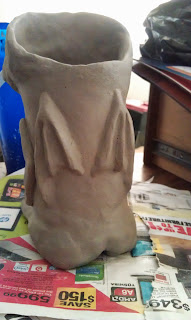
During Saturday's class I was able to finish Cthulhu. Admittedly with a bit of a rush on the legs/feet; they're not quite as nice as I would have liked but this is the last week of pottery, so I was running out of time. There'll be a raku firing on Thursday, and both my horsehair piece and Cthulhu need to be in that one, so Cthulhu had to be finished on Saturday. I actually took the piece home to baby it through the drying stage, so I'll have to take it back tomorrow night so it can get bisque fired before Thursday. The last week is always pretty insane, trying to get stuff finished at the last minute. But anyhow, Cthulhu is all done as far as sculpting goes. I realized last night that so far this summer I've made 4 pieces, each of which will be finished with different techniques. The teapot will be fired in the usual, high fire way, after being painted with underglazes and having a clear glaze applied (I'm hoping). Then the horsehair piece will be rak...

Sculpture Time

Image
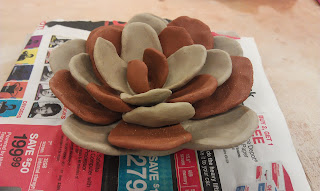
Last night I finished my flower sculpture. I think it turned out very nicely, although I had a heck of a time trying to avoid getting red clay dust on the white clay. I finally gave up trying to scrape off the dust that did get on there; I'm hoping once the sculpture has dried a bit I can just brush it off. The timing looks ok for this to make it into the soda firing, so that's exciting. Our instructor said there may be glazes to use with that, but I think I'll just leave it plain; the glaze from the soda looks spectacular even on plain clay in different colors, so that's plenty of decoration. After the flower was done, I moved on to another sculptural project. It's a sculptural dice cup in the shape of H. P. Lovecraft's Cthulhu . I'm trying to follow this description from The Call of Cthulhu : A monster of vaguely anthropoid outline, but with an octopus-like head whose face was a mass of feelers, a scaly, rubbery-looking body, prodigious claws on hin...

Horse Hair and Soda Firing

Image
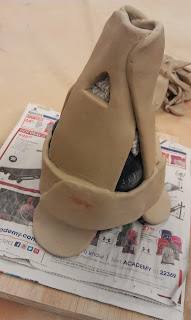
Yesterday I finished my flower holder. I cleaned it up, then burnished it with the back of a metal spoon. Then I painted it with terra sigillata and burnished it with a plastic bag (apparently blue Walmart bags are the best for this, but I made do with a generic grocery bag). It now has a shiny, smooth finish, which is required for horse hair. You can kind of see the shininess in the picture; this piece looks lighter than others I've photographed because it's reflecting more light. The piece will be bisqued and then fired in a raku kiln; it won't have any glaze applied. Next I started on a small sculpture of a rose, which will hopefully be part of a soda firing that will be done during the last week of classes. Soda firing is accomplished by blowing baking soda or soda ash into a hot kiln; this results in the pieces within essentially being glazed on all their surfaces. The pieces are propped on raw clay in order to prevent their sticking to the kiln shelves. White ...

My Majigger!

Image
Last night was the third pottery class of the summer. I finished up my teapot by cleaning it up a bit, paring down the excess clay on the bottom, and embiggening the hole in the spout, as I was a little paranoid about how small it'd be after the clay shrinks and glaze is applied. I tried to model the shape of the spout hole after an electric kettle I have which pours magnificently. The spout hole in that kettle is slightly oval, flat across the top, and doesn't spill even a drop of water. Whether or not my teapot will pour well remains to be seen, of course... Next I started on a majigger for my grandma. It's a silk flower holder (doesn't that sound nicer than "fake flower holder"? One of the other students came up with that ;) ) and will be finished with the horse hair technique . This means I'll have to burnish the clay and paint it with terra sigillata, then it will be bisqued and later fired in the raku kiln. Then I'll put horsehair or other org...

Pottery Time!

Image
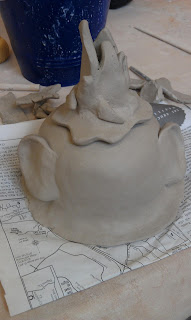
I'm currently taking a pottery class for the fourth summer in a row (via Doña Ana Community College's Community Education Program ). I figured I might as well blog about that creative exploit, as well, because why not? It might help me get a better idea of how much I can accomplish for next time, at least, as I always have about a million projects I want to complete and not enough time to do so. So being able to prioritize and plan better would be swell. Anyhow, I'm nearly done with my first project. The first class was on Thursday and we spent an hour or an hour and a half discussing what we all wanted to accomplish. The class I'm in is for "advanced" students (aka we've all taken pottery at least once before), so we all have ideas on what we want to do. My list of things I want to make is, of course, extensive. ;) After that, our instructor encouraged us to try making a "30 Minute Teapot" which has now taken me at least 4 hours, but I can n...